
How to Invite Users and Set Roles and Permissions in VerusTrust Forms
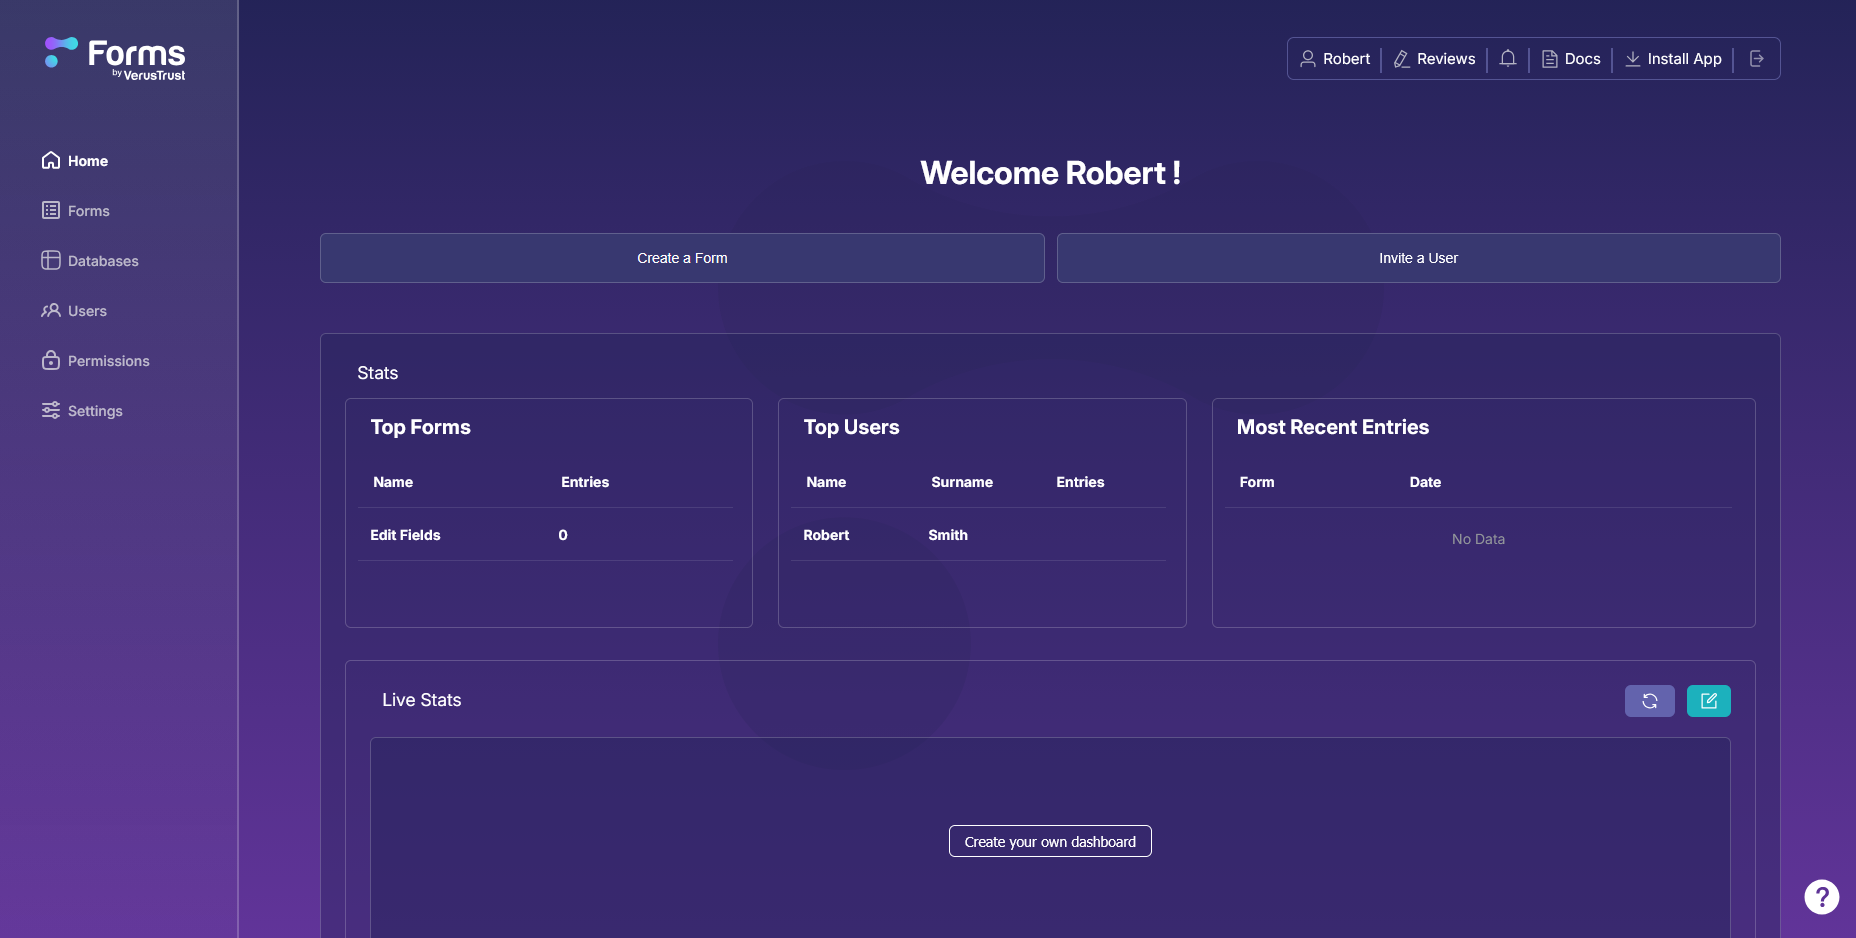
To invite a user to VerusTrust Forms, select Invite a User on the Home page, enter the person’s name and email address, choose a role, and select Add. The role decides what that person can do in your account. You can check and adjust the permissions behind each role under Permissions > Roles, where every action, such as creating forms or viewing entries, is set to Allow or left Not Set.
This guide is part of the VerusTrust Forms Help Center. It walks you through the invite first, then shows you how to check and change what each role can do.
Before You Start
Every plan includes unlimited users, so you can bring in your whole team, contractors and reviewers included, without paying per seat. Plans limit the number of devices, not the number of people.
Before you invite anyone, decide what each person needs to do. Someone who only fills in forms in the field needs far less access than a manager who builds forms and reviews entries.
Step 1: Open the Add User Window
Select Invite a User on the Home page. You can also go to Users in the sidebar and select the + button next to the Users heading. Either way, the Add User window opens.
Step 2: Enter the User's Details
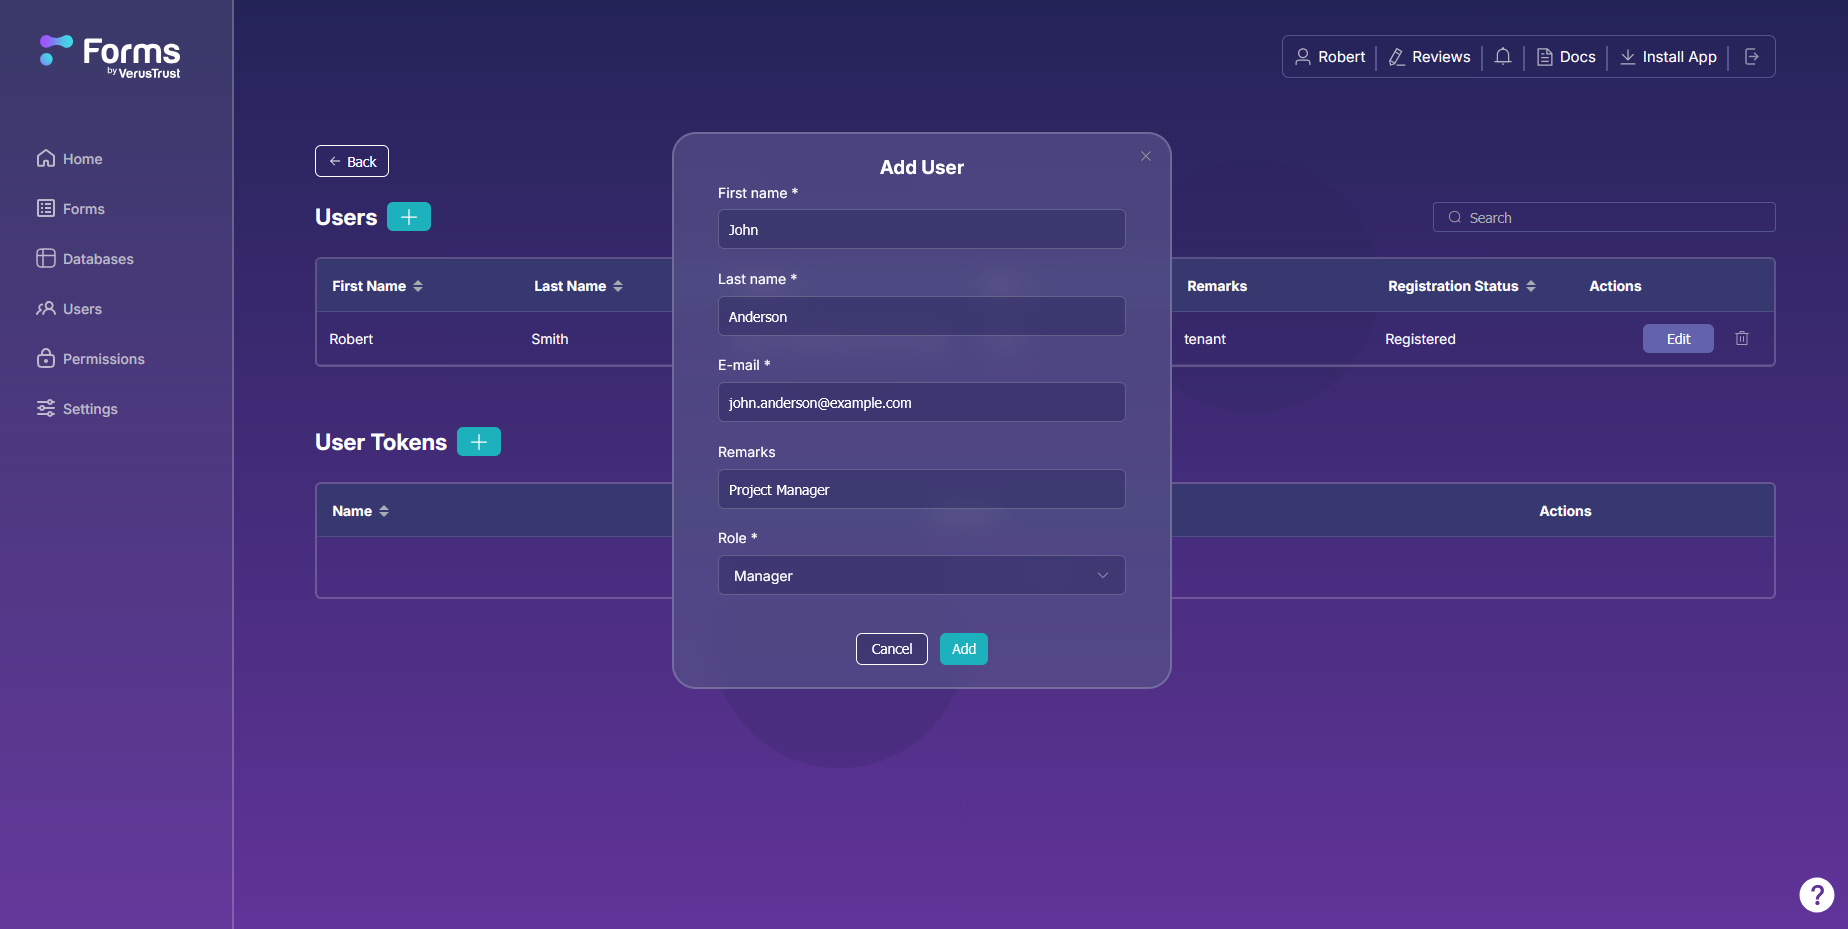
Fill in the Add User window. Fields marked with an asterisk (*) are required.
| Field | Required | What to enter |
|---|---|---|
|
First name
|
Yes |
The person’s first name.
|
|
Last name
|
Yes
|
Their last name.
|
|
E-mail
|
Yes |
The address the invitation goes to. Use one they check regularly, since it’s also the address they’ll sign in with.
|
|
Remarks
|
No
|
A note for your own team, such as a job title or “contractor”. It shows in the Remarks column of the Users list.
|
|
Role
|
Yes
|
What the person can do in your account. Step 3 covers the options.
|
Step 3: Choose a Role and Send the Invite
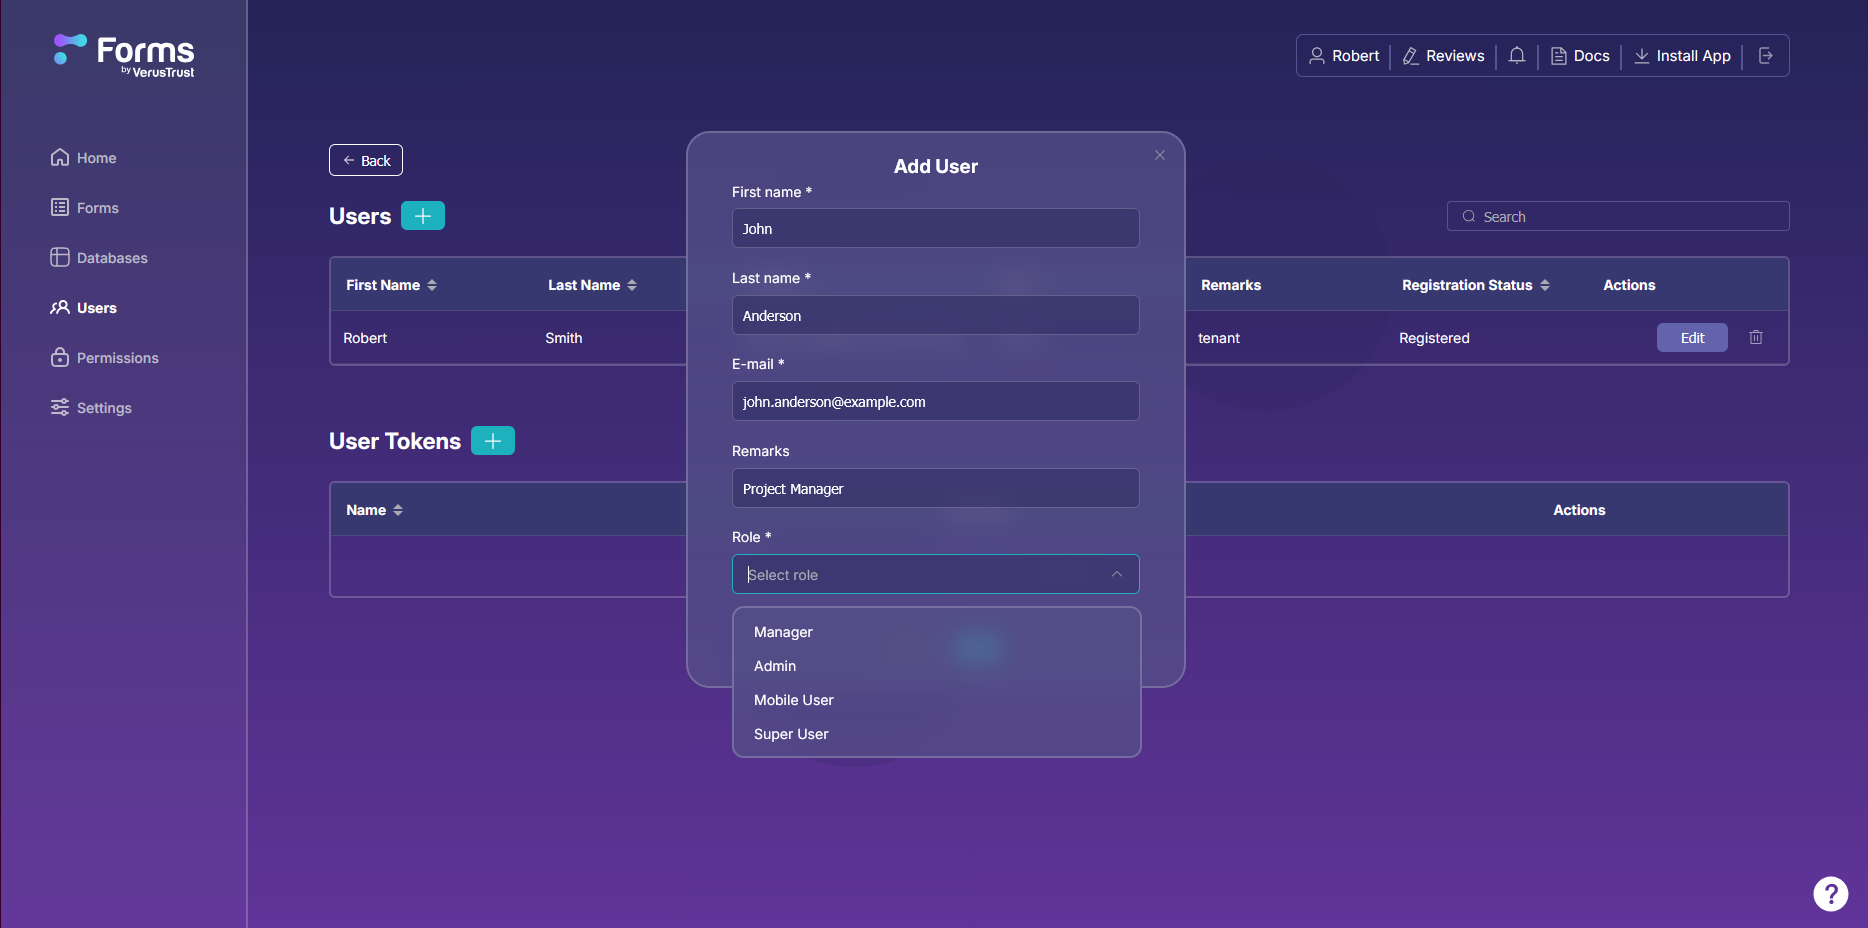
Open the Role list and pick one of the four roles: Manager, Admin, Mobile User or Super User. For field crews who only fill in forms in the mobile app, Mobile User is the role named for that job. Check its permissions in Step 4 to confirm it fits.
Pick the role with the least access that still covers the person’s job. Widening someone’s access later takes a minute. Undoing changes made with access they never needed takes much longer.
Select Add. The person appears in the Users list, and the Registration Status column shows whether they’ve finished registering.
Step 4: Check What Each Role Can Do
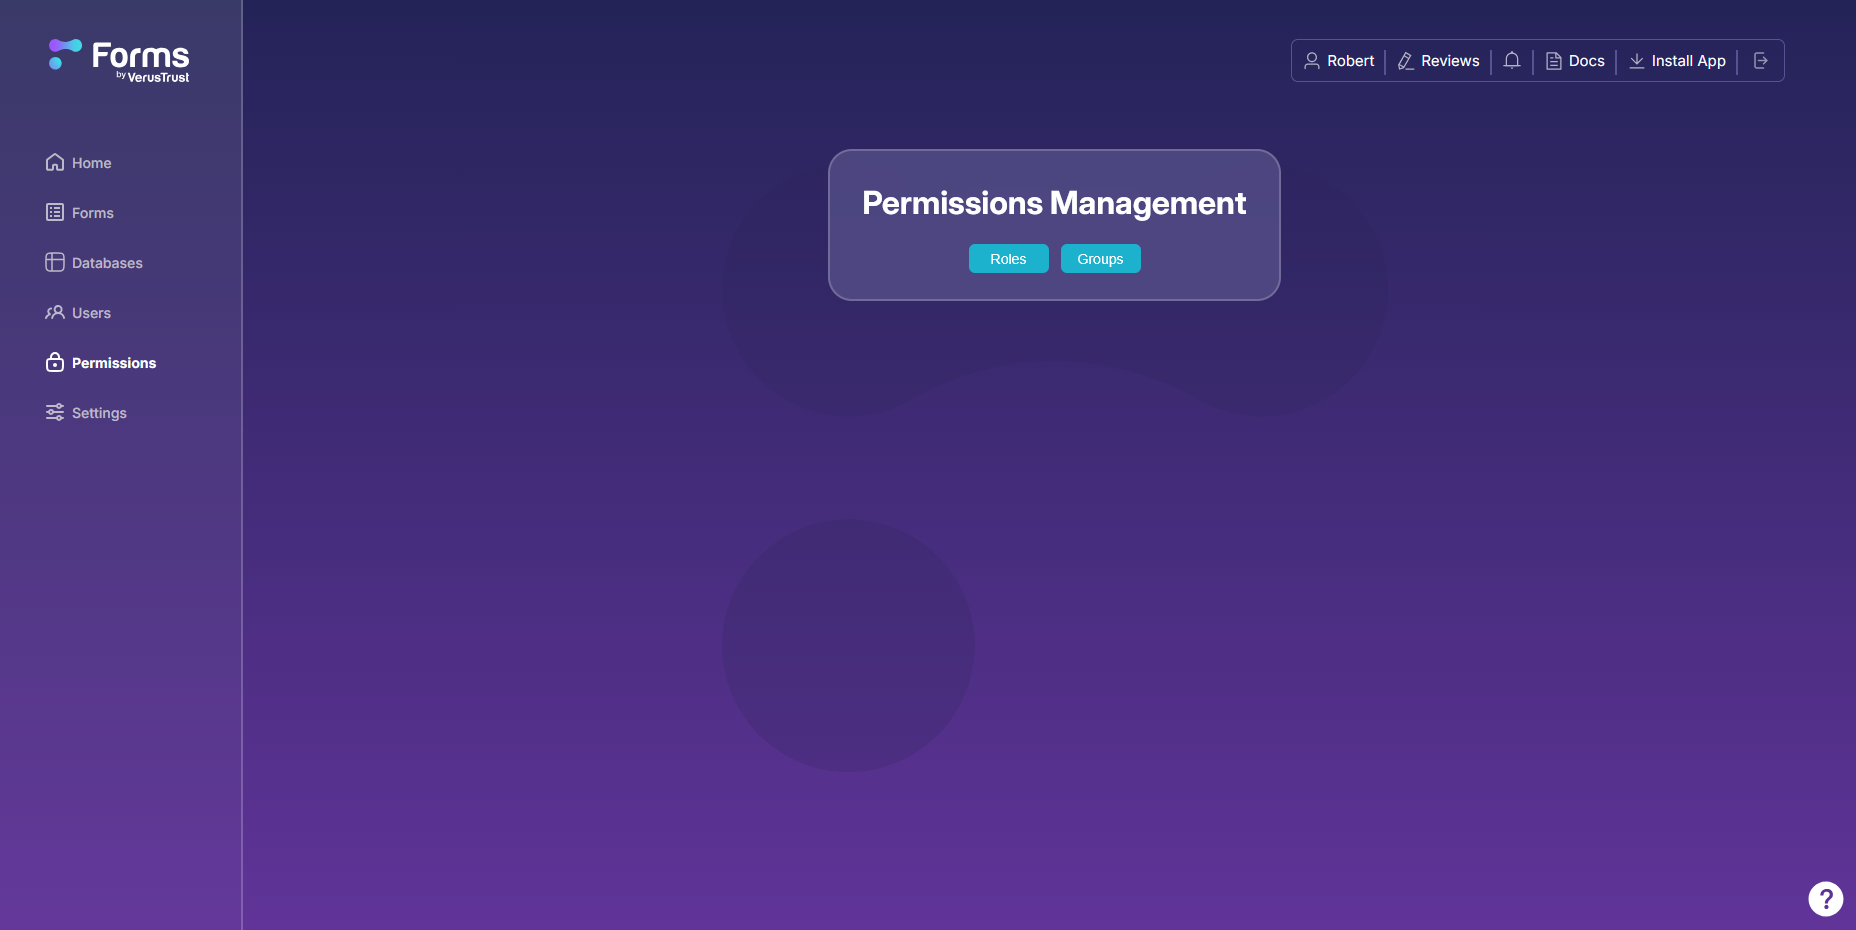
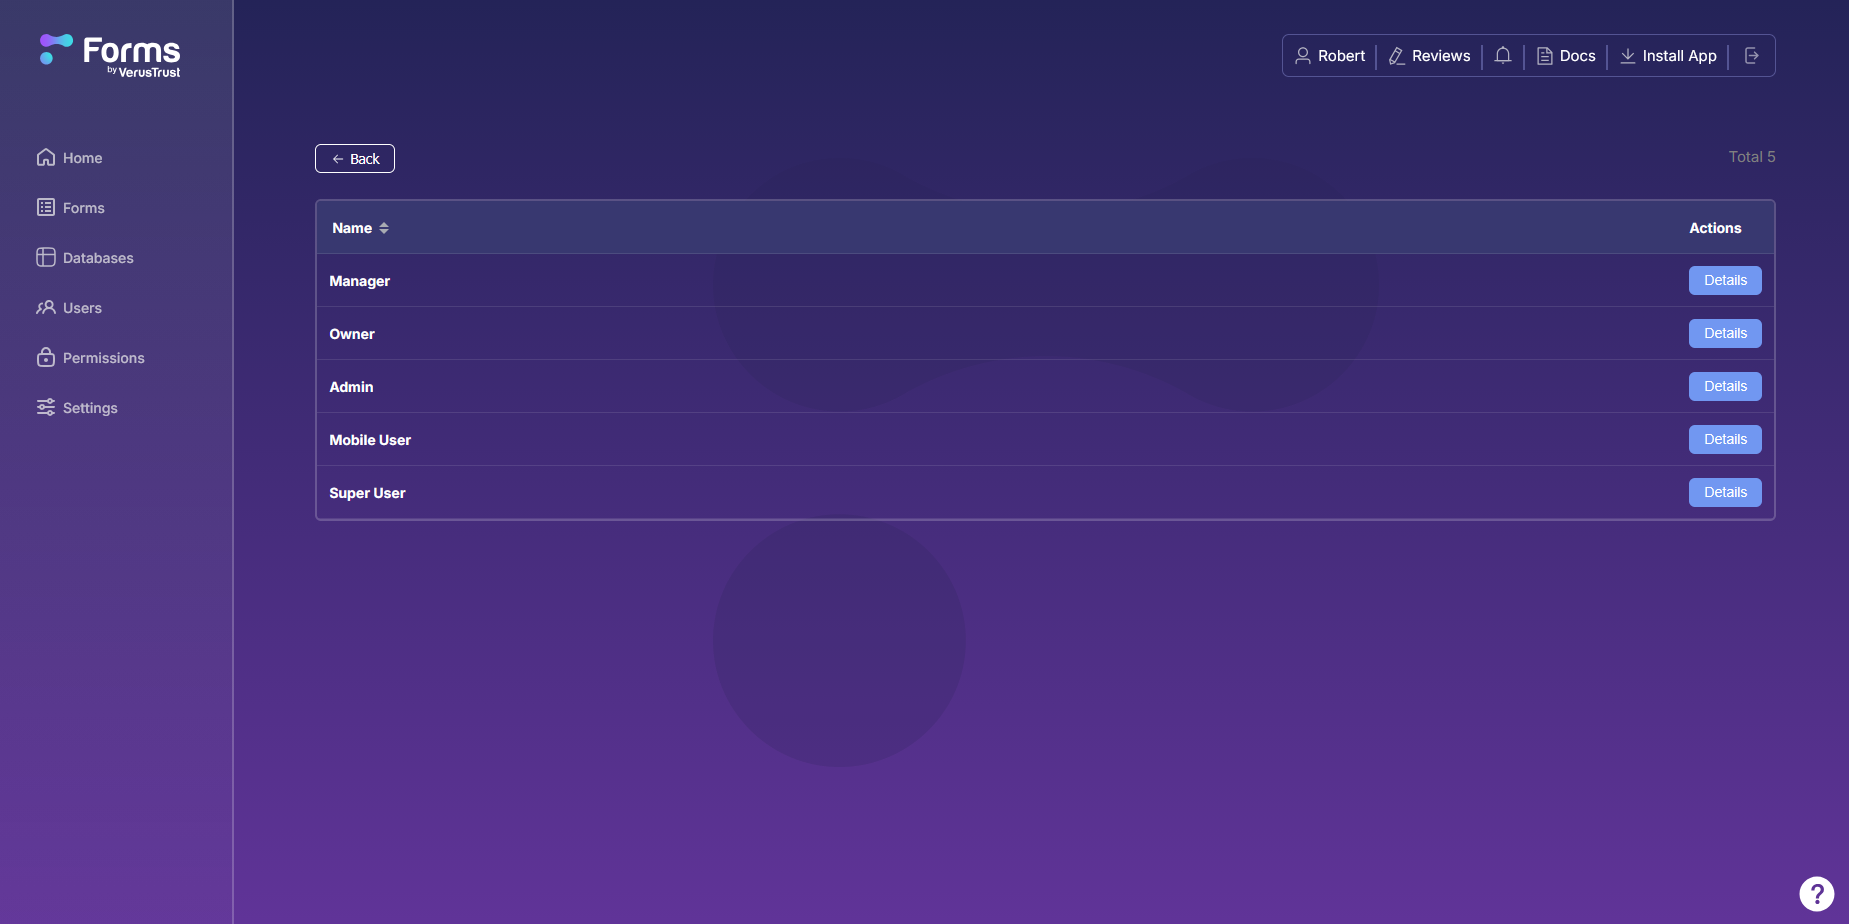
Select Permissions in the sidebar. The Permissions Management page has two options, Roles and Groups. Select Roles.
The roles list shows every role in your account: Manager, Owner, Admin, Mobile User and Super User. Owner appears here but not in the Add User window, so you can’t give it to someone you invite. Select Details next to any role to open its permissions.
Groups sits next to Roles on the Permissions Management page. Use groups to organize users by department, region or project.
Step 5: Adjust a Role's Permissions
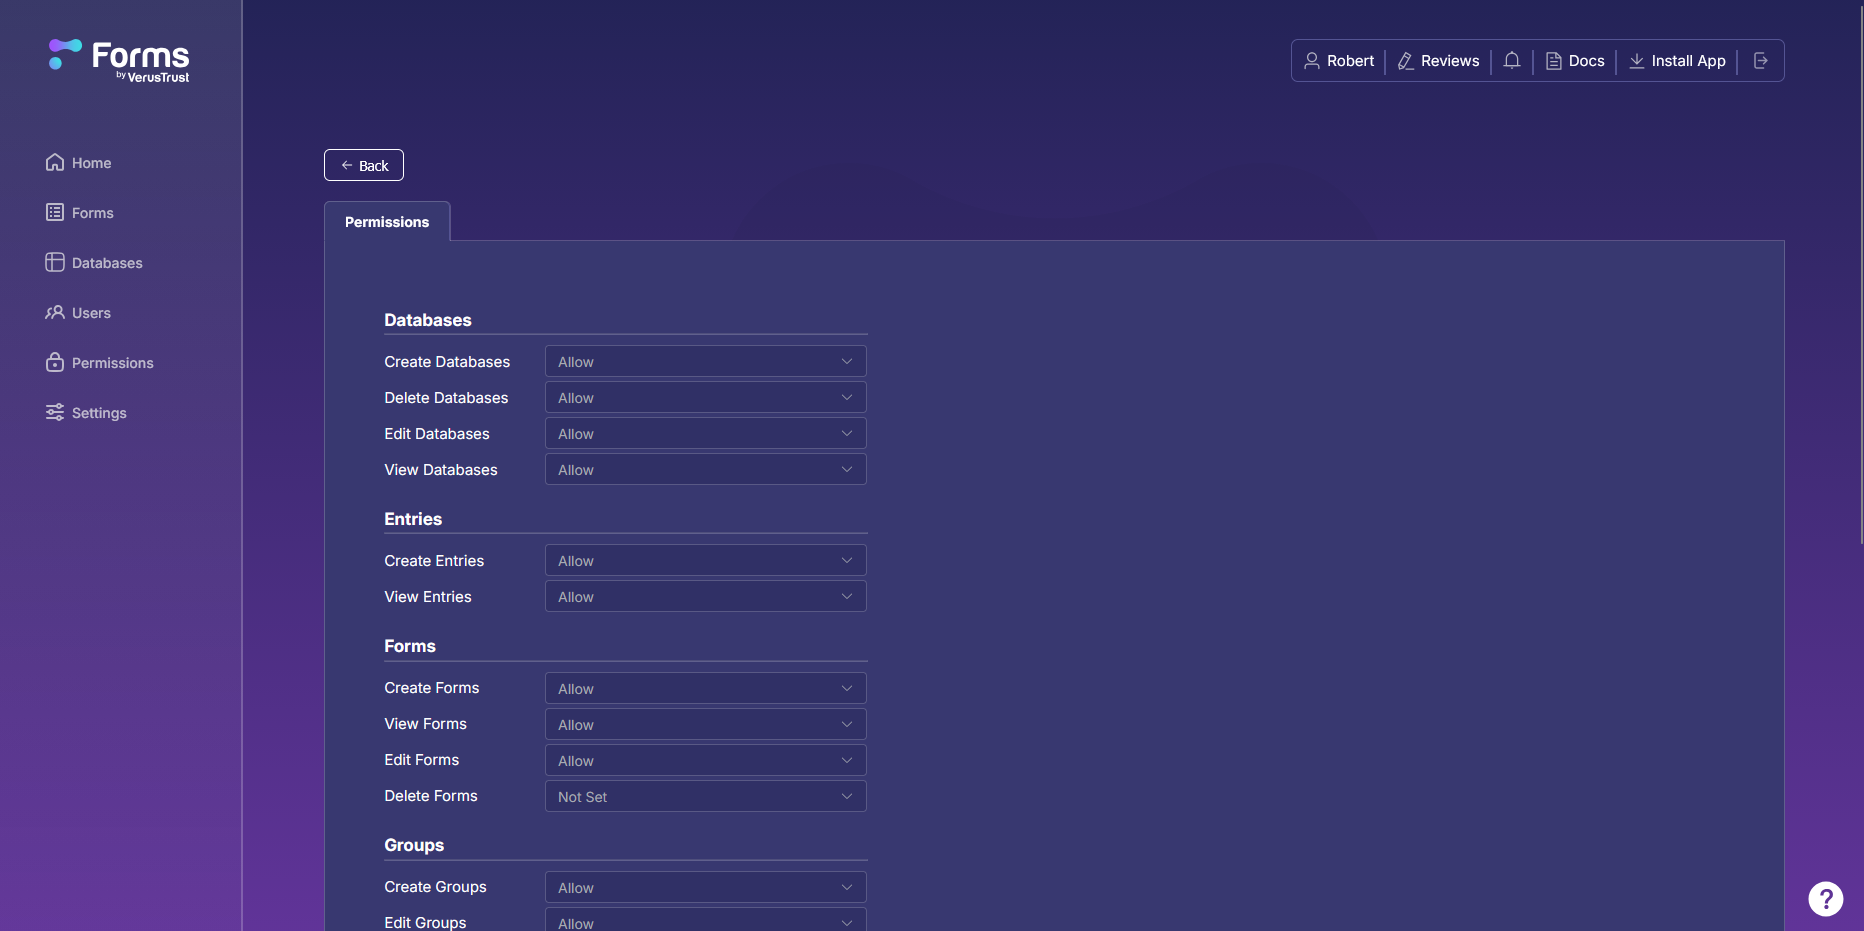
A role’s permissions page lists every action that role can take, grouped by area of the platform. Each action has a dropdown set to Allow or Not Set.
| Area | Actions you can control |
|---|---|
|
Databases |
Create, Delete, Edit and View Databases
|
|
Entries |
Create Entries and View Entries
|
|
Forms |
Create, View, Edit and Delete Forms
|
|
Groups |
Create Groups, Edit Groups and more further down the page
|
To change what a role can do, change the dropdown next to an action. The change applies to every user with that role, so check who holds a role before you widen or narrow it.
The same permissions apply on the web and in the mobile app, including when someone is working offline.
Edit or Remove a User
The Users page lists everyone in your account, with a Search box for finding someone quickly. Select Edit next to a user to change their details or role, or select the trash icon to remove them from the account.
Frequently Asked Questions
Can I give an auditor or client read-only access?
Yes. Give them a role whose permissions cover only what the review needs, such as View Forms and View Entries, with everything else left Not Set. Check that role’s Details first, because every user with the same role gets the same access. An auditor set up this way can check your records without being able to change a form or add entries.
Do roles and permissions apply in the mobile app?
Yes. A user’s role controls what they can do on the web and in the mobile app, including when they’re working offline with no signal.
Can I change someone's role after inviting them?
Yes. Go to Users, select Edit next to the person, choose a new role, and save. Their access changes to match the new role.
How many users can I invite?
As many as you need. Every plan, including Free, includes unlimited users. Plans limit the number of devices, so you can add reviewers and office staff without running into a seat cap. If you haven’t signed up yet, start on the Free plan and invite your team today.