
How to Build Your First Form in VerusTrust Forms
To build your first form in VerusTrust Forms, open Forms from the sidebar, select the + button, and name the form. You can start from a blank canvas or pick a ready-made template. Then drag fields from the Elements panel onto the canvas, set up each one, and select Save.
This guide is part of the VerusTrust Forms Help Center, and covers each of those steps in order, then shows you how to open the saved form with Fill and check it the way your team will see it.
Before You Start
You need a VerusTrust Forms account. If you don’t have one yet, create your account first. It takes about two minutes.
Each plan includes a set number of forms, and the Free plan includes one. A counter on the Forms page shows how many you’ve used, so you’ll always know how much room you have left.
Step 1: Open the Forms Page
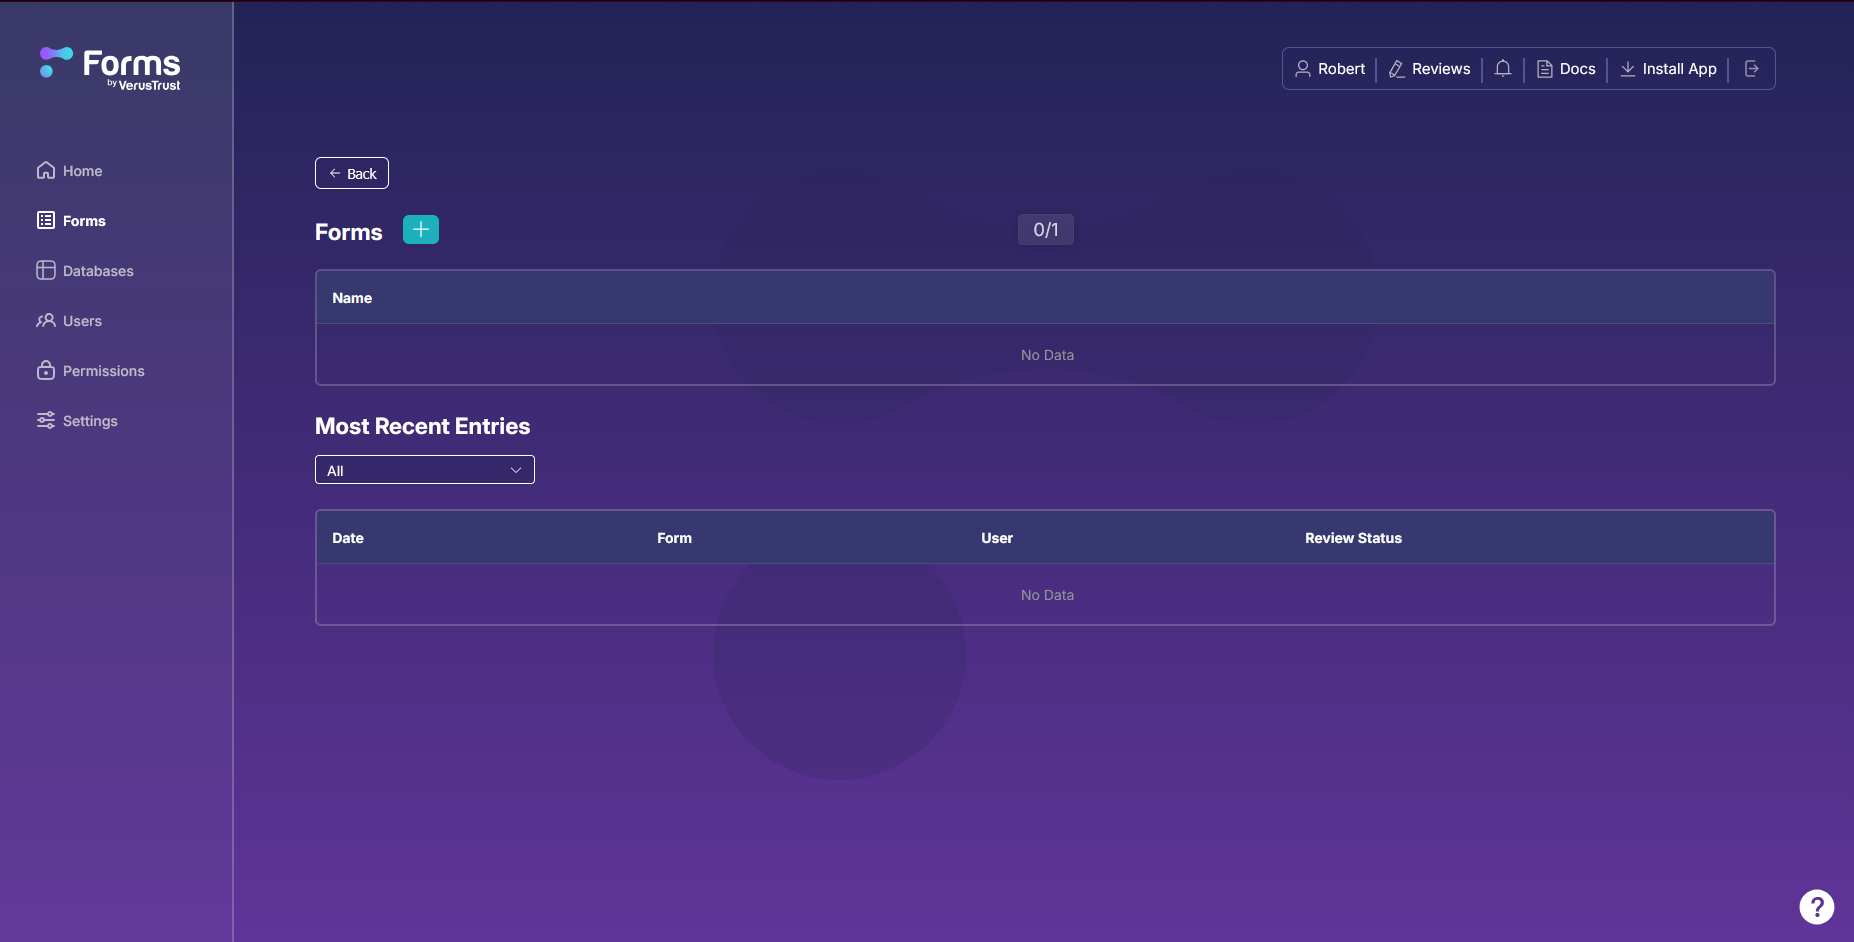
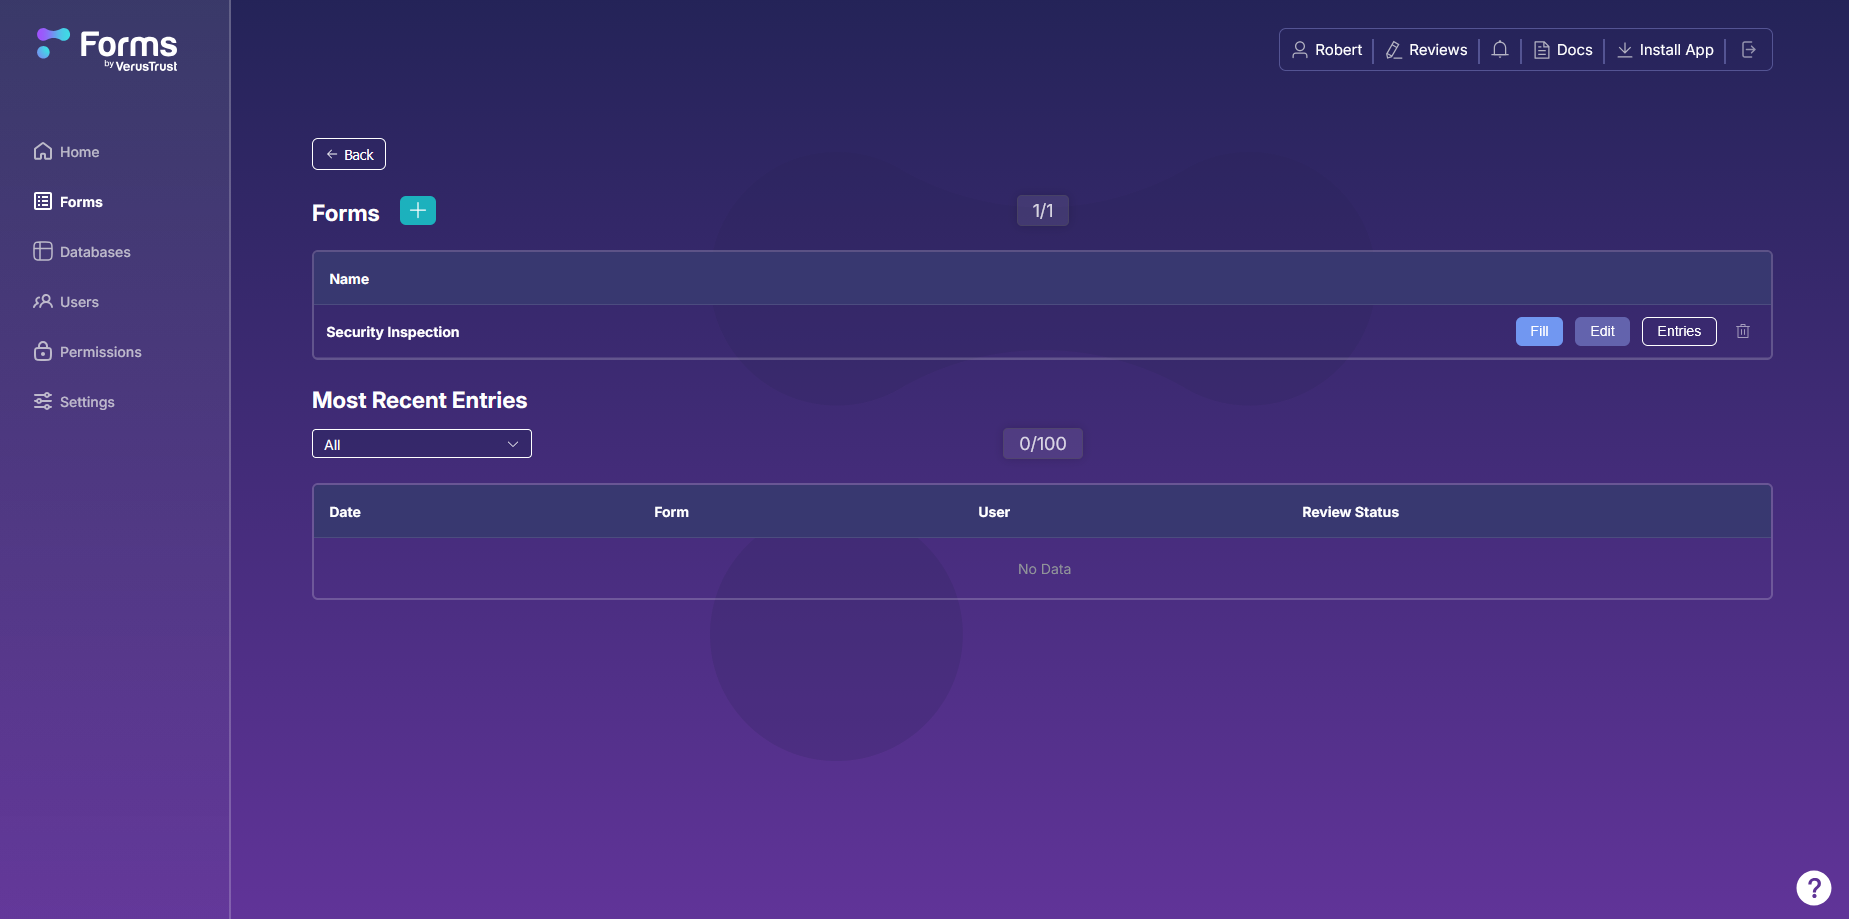
Select Forms in the left sidebar. The Forms page lists every form in your account, with the + button for creating a new one next to the heading.
The counter beside the heading (0/1 on a new Free account) shows how many forms you’ve created out of your plan’s allowance. Below the list, Most Recent Entries shows the latest submissions across all your forms. It stays empty until someone fills a form in.
Step 2: Create the Form
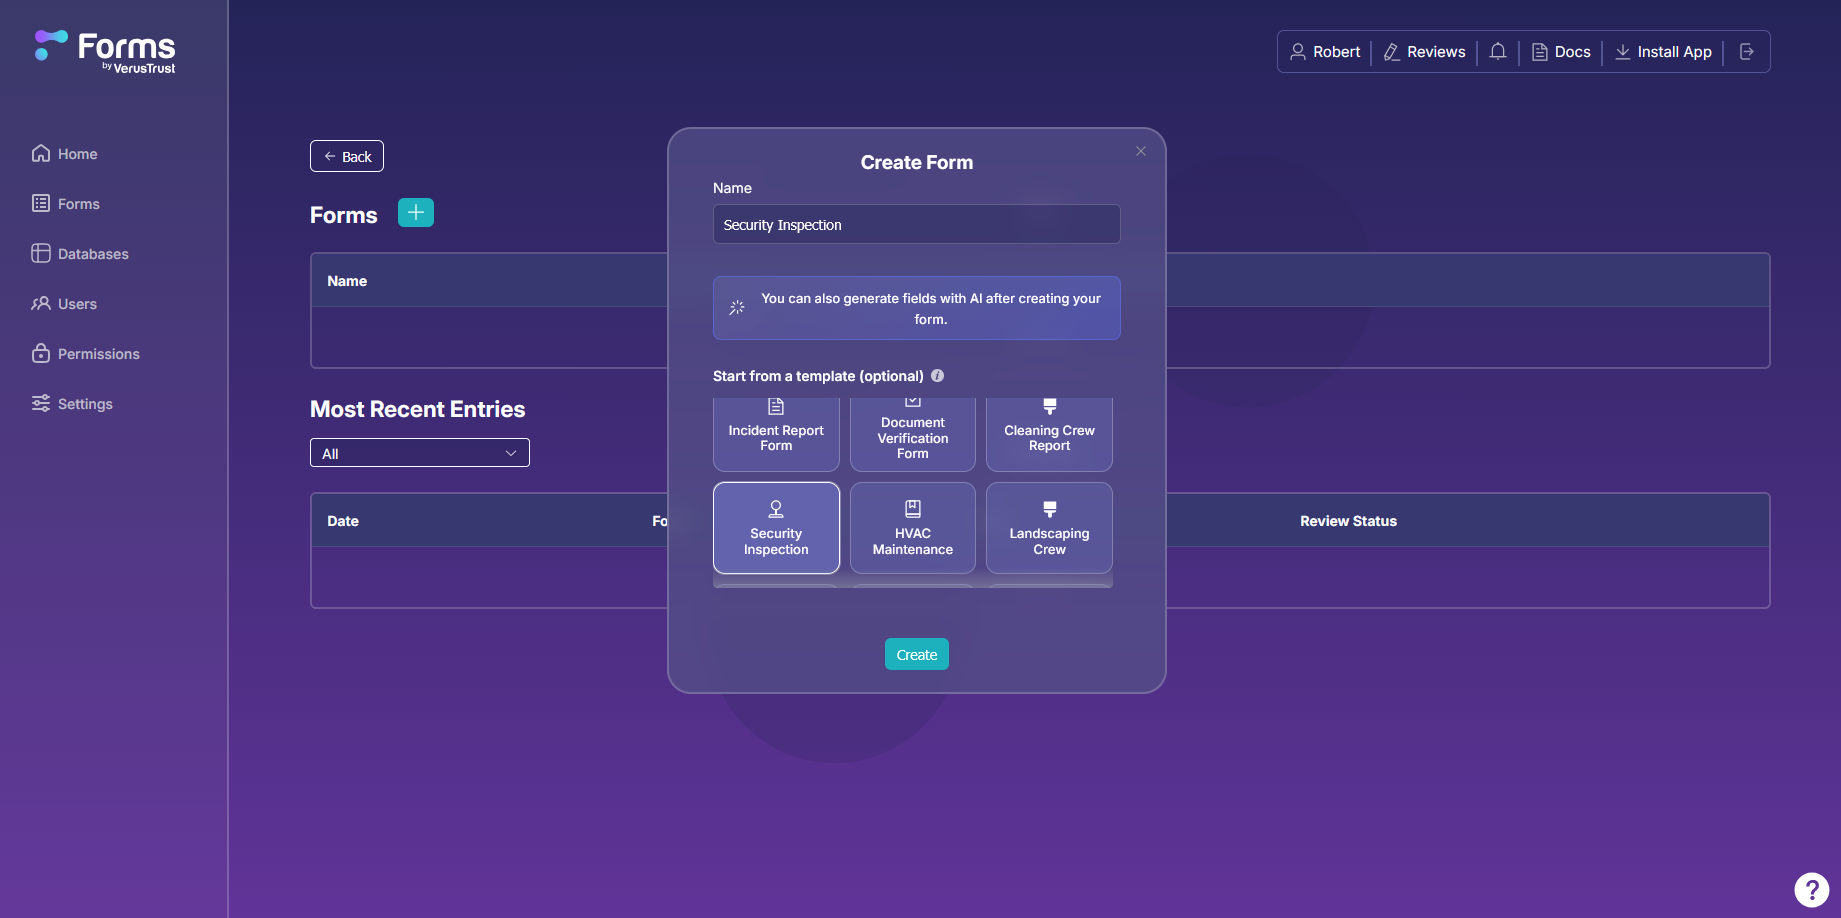
Select the + button next to the Forms heading. The Create Form window opens.
- Name: type a name your team will recognize, such as “Security Inspection” or “Daily Site Report”. You can change it later.
- Start from a template (optional): pick a ready-made form to start from, such as Incident Report Form, Security Inspection, HVAC Maintenance or Landscaping Crew. Scroll the list to see more. A template gives you a full set of fields you can edit, delete or add to. Skip it to start with an empty canvas.
Select Create to open the form in the builder. The window also reminds you that you can generate fields with AI once the form exists. The AI Form Builder FAQ covers that route.
Step 3: Add Fields with Drag and Drop
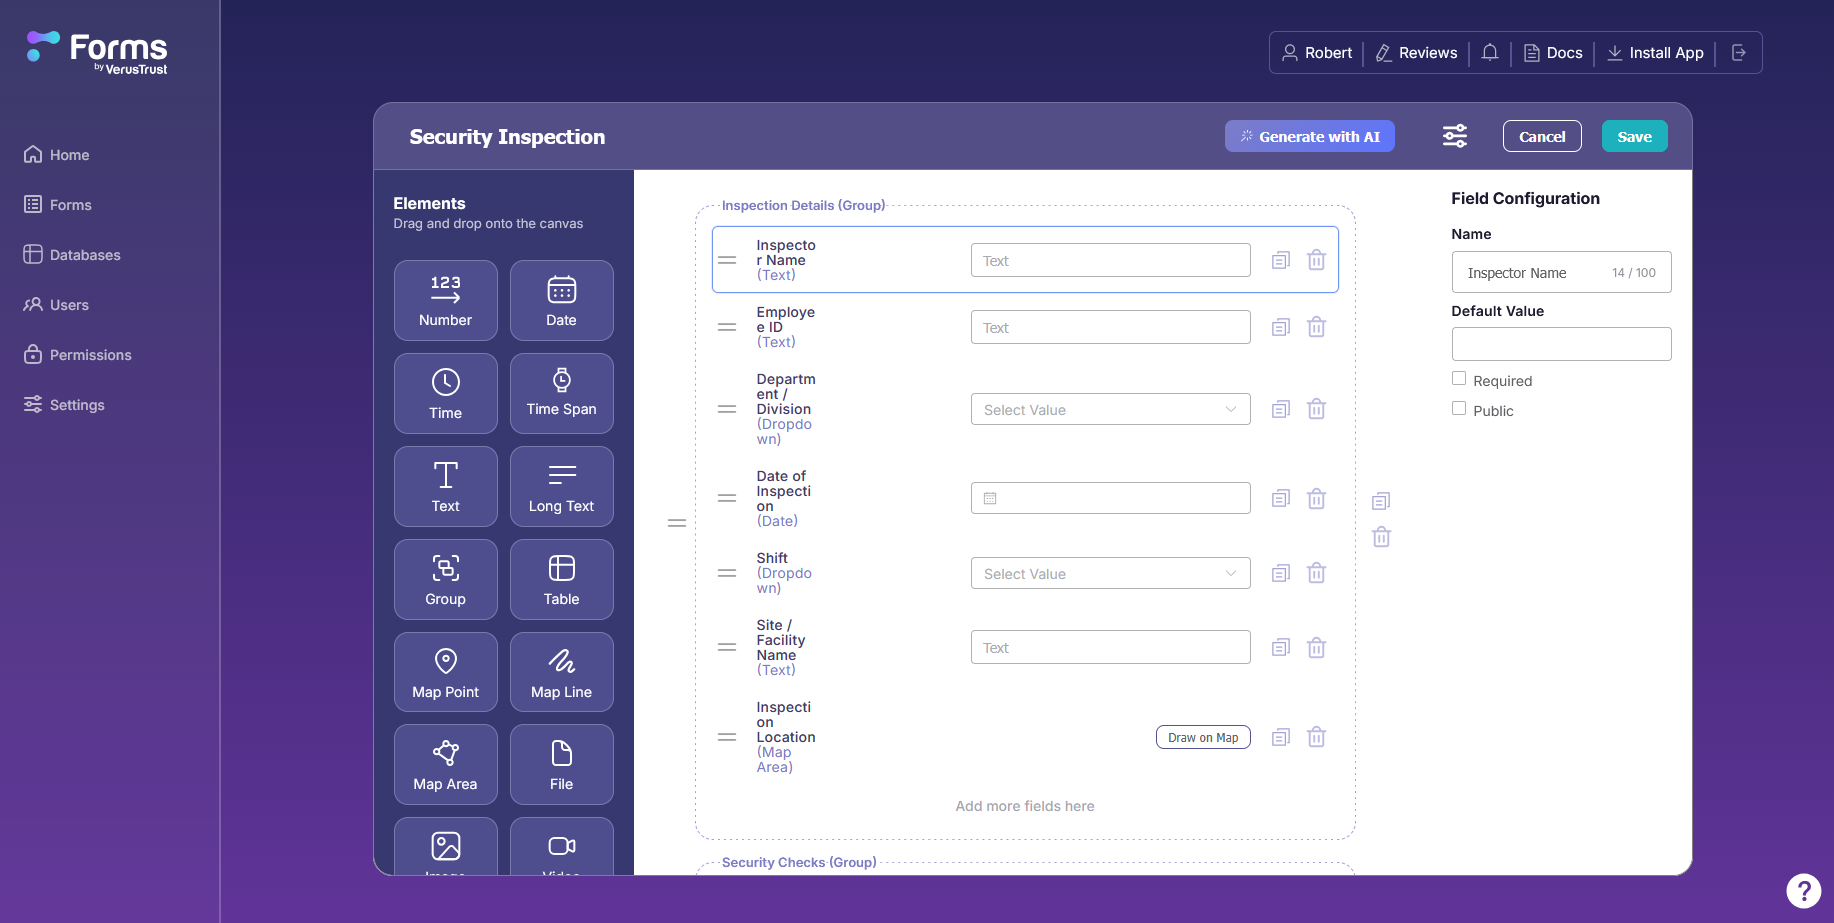
The builder has three areas. The Elements panel on the left holds every field type. The canvas in the middle is your form. The Field Configuration panel on the right shows the settings for whichever field you’ve selected.
To add a field, drag it from the Elements panel and drop it onto the canvas, either between existing fields or on the Add more fields here area at the bottom. The Elements panel scrolls, and these are the field types it offers:
| Field | What to enter |
|---|---|
|
Number |
Counts, measurements and readings
|
|
Date / Time |
When something happened
|
|
Time Span |
A length of time, such as a shift or a job’s duration
|
|
Text / Long Text |
Short answers such as a name, or longer notes and descriptions
|
|
Group |
A labeled section that holds related fields together
|
|
Table |
Repeating rows of entries, such as one row per item checked
|
|
Map Point / Map Line / Map Area |
A location, a route, or a boundary drawn on a map
|
|
File / Image / Video |
Attachments and photo or video evidence |
Each field on the canvas has three controls:
- Drag handle (≡): drag a field up or down to reorder it, or into a different group.
- Duplicate icon: make a copy of the field, settings included.
- Trash icon: delete the field.
Use groups to split a long form into sections, as the Security Inspection template does with Inspection Details and Security Checks. For tables, media fields and validation rules, see how to add advanced field types. For the three map fields, see how to capture location with points, lines, and polygons.
Step 4: Set Up Each Field
Select any field on the canvas to open its settings in the Field Configuration panel.
- Name: the label people see on the form, up to 100 characters.
- Default Value: an answer the field starts with, which the person filling the form in can change. Useful for values that are usually the same, such as a site name.
- Required: tick this if the form can’t be submitted without an answer to this field.
- Public: the field will be included in a blockchain smart contract, and will be visible to the public.
Work through the fields from top to bottom. It’s faster than jumping around, and it’s also the order your team will fill them in.
Step 5: Save Your Form
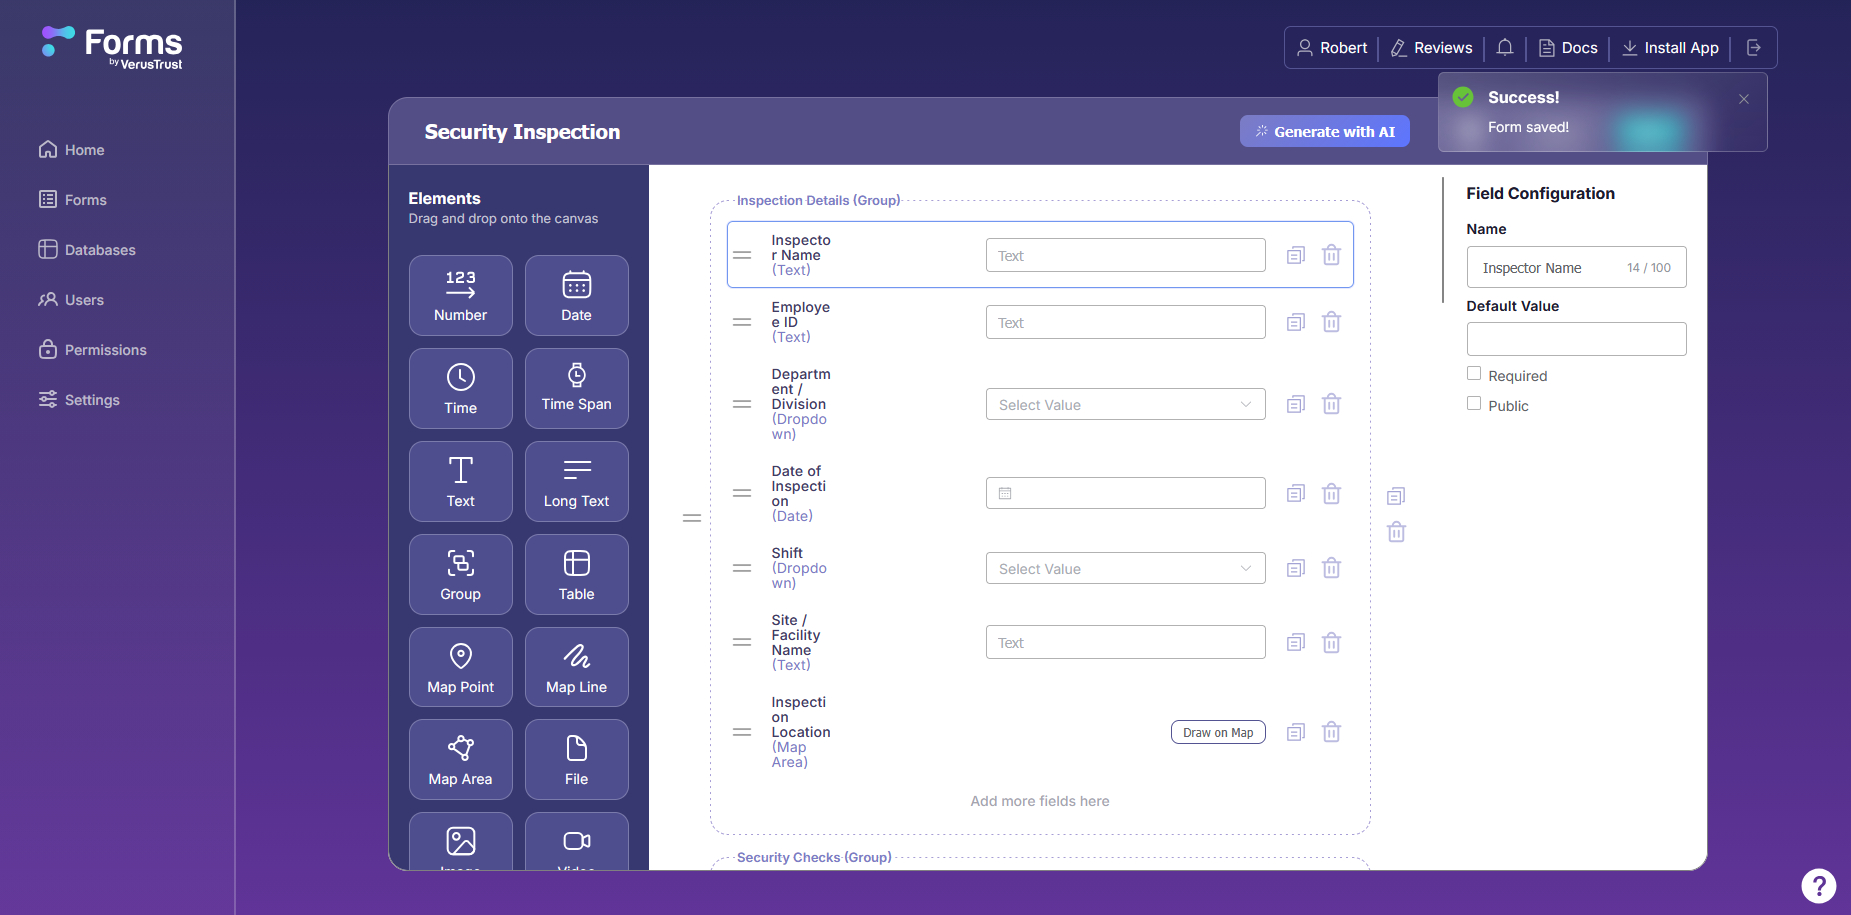
Select Save in the top right of the builder. A Success! Form saved! message confirms your changes are stored.
Save whenever you finish a round of edits. Cancel closes the builder without keeping changes you haven’t saved.
Step 6: Check the Form with Fill
Your form now appears on the Forms page, and the counter goes up by one. Each form in the list has four controls:
- Fill: opens the form the way your team will see it. Use it to check the layout, the field order, and which fields are required before anyone uses the form for real.
- Edit: reopens the form in the builder.
- Entries: shows every submission made with this form.
- Trash icon: deletes the form.
Forms behave the same on the web and on a phone, so what you see in Fill is what your crew gets in the field.
If you submit a test entry, it counts toward your plan’s monthly form answers, shown by the counter next to Most Recent Entries.
What to Do Next
- Invite your team and set roles and permissions so each person sees and does only what their job needs.
- Install the mobile app so your crew can fill in the form offline.
- Turn on blockchain verification for the fields that need a tamper-evident record.
Frequently Asked Questions
Can I build a form without starting from scratch?
Yes. In the Create Form window, pick one of the ready-made templates, such as Incident Report Form or HVAC Maintenance. You get a complete form you can edit like any other: rename fields, delete what you don’t need, and drag in more.
Can AI build the form for me?
Yes. Create the form, then select Generate with AI at the top of the builder and describe the form you need in plain language. The AI Form Builder picks field types that fit your description, such as a map field for a location or a table for repeating entries. You can then edit the result like any other form.
Can I change a form after I've saved it?
Yes. Select Edit next to the form on the Forms page, make your changes, and select Save again.
Do forms work on phones as well as the web?
Yes. A form looks and behaves the same in the browser and in the mobile app, including required fields and validation rules. Field crews can fill it in offline and sync it later.
How many forms can I build on the Free plan?
One. The counter on the Forms page shows how many you’ve used. Paid plans raise that limit, and you can upgrade without losing anything you’ve built. If you haven’t signed up yet, start on the Free plan and your first form can be ready before your coffee’s cold.